
Spicy Deviled Eggs with Sriracha Bacon for a Flavorful Twist
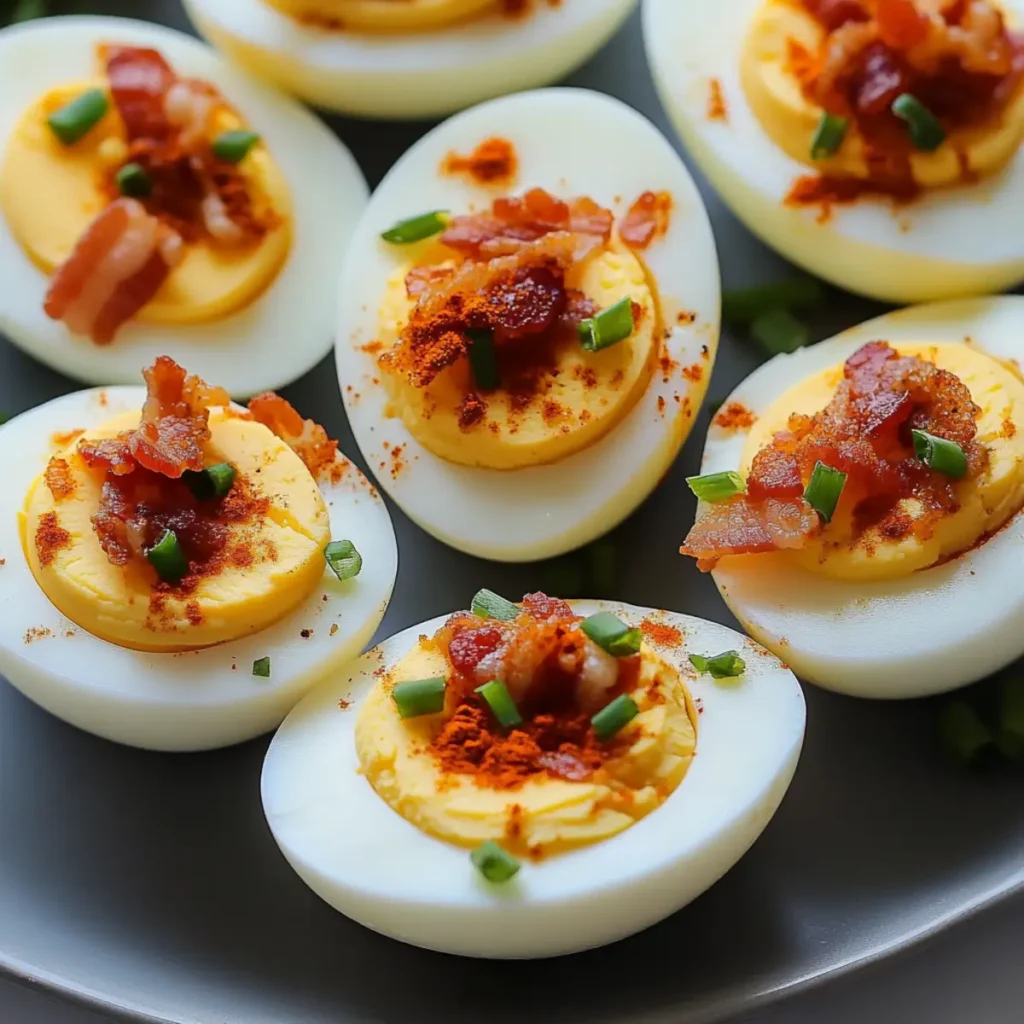
If you’re looking to spice up your appetizer game, then these Spicy Deviled Eggs with Sriracha Bacon are your new best friends. Imagine a delightful burst of creamy yolk mixed with a kick of Sriracha, each bite perfectly complemented by crispy bacon. These eggs are not just a dish; they’re a mini celebration of flavors, textures, and colors that bring a party to your taste buds. Not only do these Spicy Deviled Eggs with Sriracha Bacon taste phenomenal, but they’re also the kind of dish that sparks conversations and cravings. From backyard barbecues to cozy family dinners, they’re perfect for every occasion. Picture your loved ones eagerly reaching for these vibrant, inviting bites as you proudly share the story of how a basic egg became an irresistible culinary sensation. Ingredients for Spicy Deviled Eggs with Sriracha Bacon Here’s what you’ll need to make this delicious Spicy Deviled Eggs with Sriracha Bacon: 6 large eggs – Choose the freshest eggs you can find for the best flavor and texture. 1/4 cup mayonnaise – A creamy base that adds richness; feel free to use low-fat options if you prefer. 1 tablespoon Dijon mustard – This adds a tangy zest that enhances the flavors beautifully. 1 tablespoon Sriracha sauce – Adjust the amount based on your heat tolerance; this ingredient brings the spice. to taste salt – Enhances all the flavors; start with a pinch and adjust as needed. to taste pepper – Freshly cracked black pepper adds depth; use it generously for a bit of zing. 4 slices cooked bacon – Crisp and crumbled, this adds a smoky crunch that makes each bite exciting. 2 tablespoons chives or green onions – Chopped and added for freshness and color; they brighten up the dish. 1 teaspoon paprika – A sprinkle on top gives a lovely finishing touch with a subtle smokiness. How to Make Spicy Deviled Eggs with Sriracha Bacon Follow these simple steps to prepare this delicious Spicy Deviled Eggs with Sriracha Bacon: Step 1: Hard Boil the Eggs Start by placing the eggs in a pot and covering them with cold water. Bring the water to a boil over medium-high heat. Once boiling, cover the pot and remove it from the heat. Let it sit for 9-12 minutes before transferring the eggs to an ice bath to cool. Step 2: Peel and Halve Once the eggs are cool enough to handle, crack the shells by gently tapping them on a hard surface. Peel the eggs and slice them in half lengthwise. Carefully remove the yolks and place them in a mixing bowl. Step 3: Create the Filling Using a fork, mash the yolks until creamy. Then add the mayonnaise, Dijon mustard, Sriracha sauce, salt, and pepper. Mix well until everything is smooth and combined. Taste and adjust the seasoning, adding more Sriracha if you want an extra kick. Step 4: Fill the Egg Whites Using either a spoon or a piping bag, fill the halved egg whites with the creamy yolk mixture. Be generous and make them look as enticing as possible. Step 5: Add Toppings Crumble the cooked bacon over the filled eggs, and sprinkle with chives or green onions for that fresh burst of color and taste. A light dusting of paprika adds visual appeal and a hint of smokiness. Step 6: Serve and Enjoy Arrange your Spicy Deviled Eggs on a serving platter. Grab your favorite drink and indulge in these tasty bites that are sure to impress your family and friends! Now, sit back and enjoy the praises (and maybe a few obsessive requests for the recipe) as everyone digs into your astonishing Spicy Deviled Eggs with Sriracha Bacon. Seriously, be prepared to be the star of the party! Perfecting Spicy Deviled Eggs with Sriracha Bacon Cooking Process Start by hard boiling the eggs to ensure they cook evenly while preparing your filling. Once cool, mix the yolk mixture as you crisp the bacon. Finally, fill the egg whites and garnish just before serving for maximum freshness. Add Your Touch to Spicy Deviled Eggs with Sriracha Bacon Feel free to swap mayonnaise for Greek yogurt for added tanginess. Experiment with spicy mustard instead of Dijon, or consider adding avocado for a creamy twist. The beauty of this dish lies in your creativity! Storing & Reheating Spicy Deviled Eggs with Sriracha Bacon Store leftover Spicy Deviled Eggs tightly covered in the refrigerator for up to two days. For best results, do not freeze, as eggs can become rubbery. Reheat gently in the oven if needed, but serve cold for the best flavor. Sharing this recipe takes me back to a family gathering where these spicy delights stole the show. It’s always a joy to see little hands diving in, eyes lighting up with the first bite! FAQs About Spicy Deviled Eggs with Sriracha Bacon What is Spicy Deviled Eggs with Sriracha Bacon? Spicy Deviled Eggs with Sriracha Bacon is a tantalizing twist on the classic deviled egg recipe. This version infuses creamy yolk filling with zesty Sriracha sauce and crumbled bacon for a flavorful kick that’s sure to impress. Each bite delivers a delightful mix of creaminess from the mayonnaise and the crunchiness of bacon, making it a perfect appetizer for gatherings or parties. It’s an easy-to-make dish using simple ingredients, yet it packs a punch that will keep your guests coming back for more. How do you make the filling for Spicy Deviled Eggs with Sriracha Bacon? Making the filling for Spicy Deviled Eggs with Sriracha Bacon is simple and quick. After boiling and halving the eggs, scoop out the yolks and place them in a mixing bowl. Mash them up and mix them with mayonnaise, a dollop of Dijon mustard, salt, pepper, and of course, Sriracha sauce to taste. The key is to blend these ingredients until creamy and smooth. The result should be a zesty filling that holds together well when piped back into the egg whites. Can I customize the Spicy Deviled Eggs
The Best Guava Margarita Recipe Perfect for Summer Sipping
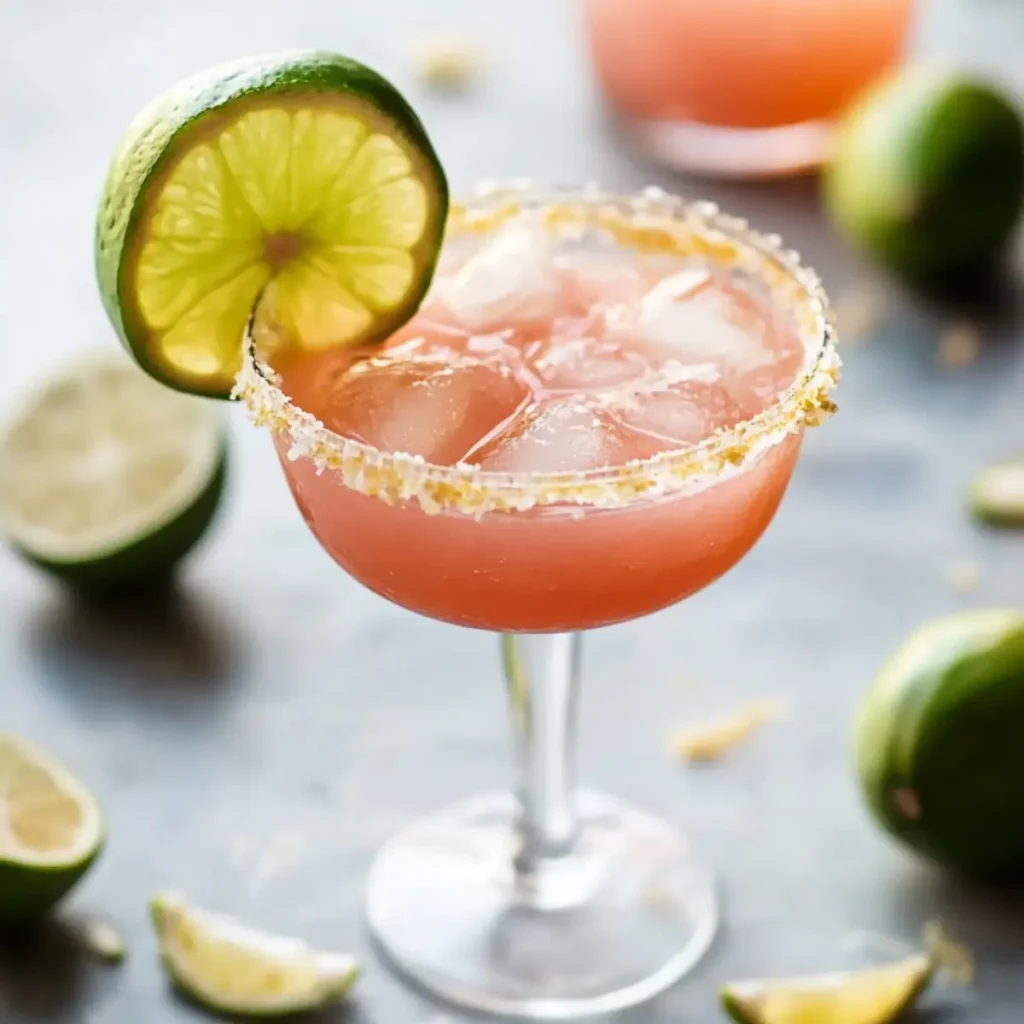
The summer sun is shining, and you’ve just settled into your favorite lounging chair, wearing your coziest shorts. Perhaps you’re surrounded by friends, or maybe you’re just enjoying a little ‘me time.’ Either way, there’s just something about a refreshing cocktail that elevates the whole experience. That’s where the best Guava Margarita comes in, bursting with tropical flavor and the sunshine spirit everyone craves. Picture this: cool guava juice mixed with the smoothness of silver tequila, bright lime juice, and a drizzle of agave syrup. It’s like a mini-vacation in a glass. Trust me, you’ll want to sip on this delightful concoction while feeling the gentle breeze on your face, as it transports you straight to a beachside bar. This heavenly drink is perfect for pool parties, barbecue nights, or simply basking on your patio after a hectic day. Ingredients for The Best Guava Margarita Here’s what you’ll need to make this delicious The Best Guava Margarita: 1 cup fresh guava juice – Look for pure guava juice for the best flavor, or make your own by pureeing ripe guavas. 2 oz silver tequila – Choose a high-quality silver tequila for the smoothest mix; it makes all the difference. 1 oz lime juice – Freshly squeezed is best for a bright and zesty kick. 1 oz agave syrup – This natural sweetener balances the tartness of lime while enhancing the guava flavor. ice cubes – Use plenty of ice to keep your drink refreshingly cold. salt or Tajín – Perfect for rimming the glass and adds a lovely contrast to the sweetness. 1 lime wedge – For garnish, because your drink deserves a bit of flair. 1 guava slice – Adds a tropical decorative touch that also serves as a garnish. How to Make The Best Guava Margarita Follow these simple steps to prepare this delicious The Best Guava Margarita: Step 1: Rim the Glass Start by rimming your glass with salt or Tajín. To do this, rub a lime wedge around the edge of the glass, then dip it into a plate of salt or Tajín to create a flavorful rim. This little extra touch elevates your margarita experience instantly! Step 2: Mix the Ingredients Grab a cocktail shaker and combine the fresh guava juice, silver tequila, lime juice, and agave syrup. This is the fun part where you can really get creative! If you prefer a slightly sweeter drink, feel free to adjust the amount of agave syrup to your liking. Step 3: Shake It Up Fill the shaker with ice, cover it, and shake vigorously for about 15 seconds. You want your drink to be well-chilled while also getting that classic cocktail shake that makes the whole experience feel fancy. Step 4: Strain and Serve Strain the mixture into your prepared glass that’s already filled with fresh ice. The color of the guava margarita should be a pretty peachy hue that screams tropical vibes! Step 5: Garnish Finish off your drink with a lime wedge and a slice of guava on the rim. This ensures every sip is beautifully presented and absolutely Instagram-worthy. Step 6: Sip and Savor Now for the best part – take a sip and let the flavors dance on your palate. Enjoy every drop of this tropical delight, and don’t forget to share it with friends (or not, no judgment here). This recipe for the best Guava Margarita not only tantalizes your taste buds but also transforms any moment into a mini-celebration. It’s that easy! Whether you’re hosting a summer party or enjoying a quiet evening in, this margarita is sure to make everything feel that much brighter. So, grab your ingredients and get ready to mix up some magical vibes! Perfecting The Best Guava Margarita Cooking Process Begin by preparing your glass—rim it with salt or Tajín. Next, combine fresh guava juice, silver tequila, lime juice, and agave syrup in a shaker. Fill it with ice, give it a good shake, and pour over fresh ice in your glass for perfect flavor. Add Your Touch to The Best Guava Margarita Feel free to get creative with your guava margarita! Swap silver tequila for flavored vodka or add fresh herbs like mint or basil for a unique twist. If you’re feeling adventurous, try adding a splash of coconut water for a tropical vibe. Storing & Reheating The Best Guava Margarita Margaritas are best enjoyed fresh, but you can refrigerate any leftovers for up to 24 hours. Just stir and pour over ice before serving again. Avoid freezing, as ice can alter the texture dramatically. The first time I made this guava margarita for friends, I could barely sip my own drink with all their compliments flying around. It turned into an impromptu fiesta that I’ll never forget! FAQs About The Best Guava Margarita What is The Best Guava Margarita? The Best Guava Margarita is a refreshing and tropical twist on the classic margarita. It combines fresh guava juice, silver tequila, lime juice, and a touch of agave syrup for sweetness. The vibrant pink color and fruity flavor make it perfect for summertime sipping or enjoying at a festive gathering. This cocktail is not only delicious but also visually stunning, making it a showstopper at any occasion. Can I customize The Best Guava Margarita? Absolutely! The Best Guava Margarita is incredibly versatile, allowing you to make it your own. Swap out the silver tequila for flavored vodka if you prefer a different base spirit. You can also incorporate fresh herbs like mint or basil to add an aromatic twist. For a creamier texture, try adding a splash of coconut cream. Don’t hesitate to experiment until you find your signature version of this delightful drink! What are the ideal serving occasions for The Best Guava Margarita? The Best Guava Margarita fits perfectly into various occasions, from casual get-togethers to sophisticated dinner parties. Its bright and cheerful flavor is a fantastic way to celebrate summer barbecues, birthday parties, or even tropical-themed gatherings. Additionally, it’s an
Valentine’s Day Ham and Cheese Pinwheels for Easy Party Bites

When it comes to whipping up delectable party snacks, nothing beats the ease and flavor of VALENTINE’S DAY Ham and Cheese Pinwheels (Easy Party Bites). These beauties are not just vibrant in appearance; they are also packed with savory goodness that will make your taste buds dance. Imagine biting into a crispy tortilla rolled tightly with heavenly layers of cream cheese, mozzarella, sumptuous ham, and a sprinkle of fresh spinach, all in a delightful bite-sized format. They are perfect for festive gatherings or last-minute cheese lover’s cravings. I still remember the first time I made these VALENTINE’S DAY Ham and Cheese Pinwheels for a friend’s birthday party. The excitement of rolling them up and the sheer delight of watching my friends munch away made it a cherished memory. They complement every occasion, from casual hangouts to more elaborate gatherings, and you can whip them up quicker than it takes to decide what to order for takeout. So, get ready for mouthwatering moments that will leave your guests asking for seconds and your heart filled with joy! Ingredients for VALENTINE’S DAY Ham and Cheese Pinwheels (Easy Party Bites) Here’s what you’ll need to make this delicious VALENTINE’S DAY Ham and Cheese Pinwheels (Easy Party Bites): 4 large flour tortillas – These serve as the base for your pinwheels; opt for soft and fresh to ensure easy rolling. 8 oz deli ham, sliced – Choose your favorite variety for flavor; smoked ham adds a lovely touch. 1 cup sharp cheddar cheese, grated – The sharpness of the cheese contrasts beautifully with the creaminess of the cream cheese. 8 oz cream cheese, softened – Ensure it is at room temperature for easy spreading; this adds a luscious texture to your bites. 1 cup fresh spinach leaves – This injection of freshness not only adds color but also balances the richness of the cheese and ham. How to Make VALENTINE’S DAY Ham and Cheese Pinwheels (Easy Party Bites) Follow these simple steps to prepare this delicious VALENTINE’S DAY Ham and Cheese Pinwheels (Easy Party Bites): Step 1: Gather Your Ingredients Collect all the necessary ingredients and tools: a cutting board, knife, rolling pin, and a platter ready for the final presentation. Step 2: Spread the Cream Cheese With a butter knife or spatula, evenly spread a generous layer of softened cream cheese over each tortilla, covering edge to edge for maximum flavor. Step 3: Layer the Ham and Cheese Once your tortillas are spread, layer on the deli ham slices followed by an even sprinkle of grated sharp cheddar cheese. Step 4: Add Fresh Spinach Now, place a handful of fresh spinach leaves on top of the cheese. This not only looks fabulous but also gives a pleasant crunch to each bite! Step 5: Roll it Up Starting at one edge, tightly roll each tortilla into a log shape. Keep the fillings from squishing out as you go—this is a delicate balancing act, but you’ve got this! Step 6: Slice and Serve With a sharp knife, slice the rolled tortillas into bite-sized pieces, about 1 inch thick. Arrange on a platter and serve immediately, or chill for a bit before serving to enhance the flavors. Keep in mind that these pinwheels are highly versatile. Add sliced bell peppers for a crunch, or try different meats and cheeses to create a flavor explosion that impresses every guest. For any gathering or even a laid-back night in, these VALENTINE’S DAY Ham and Cheese Pinwheels (Easy Party Bites) will surely steal the show. Remember to share (or not)—I won’t judge if you keep these heavenly bites all to yourself! Perfecting VALENTINE’S DAY Ham and Cheese Pinwheels (Easy Party Bites) Cooking Process To achieve the best results, start by gathering all your ingredients and prepping them. Spread the cream cheese on the tortillas first, then layer the ham, cheese, and spinach. Tightly roll each tortilla before slicing for perfect pinwheels. Add Your Touch to VALENTINE’S DAY Ham and Cheese Pinwheels (Easy Party Bites) Feel free to customize these pinwheels by swapping ham for turkey or chicken, using different cheeses like mozzarella or pepper jack, and adding herbs like basil for extra flavor. Storing & Reheating VALENTINE’S DAY Ham and Cheese Pinwheels (Easy Party Bites) To store, wrap the pinwheels tightly in plastic wrap and refrigerate for up to three days. Reheat briefly in the microwave, or serve them cold for a refreshing bite. Making these delightful pinwheels took me back to last Valentine’s Day, when my friends couldn’t stop raving about them. They were devoured in minutes, turning a casual get-together into a party to remember. FAQs About VALENTINE’S DAY Ham and Cheese Pinwheels (Easy Party Bites) What is VALENTINE’S DAY Ham and Cheese Pinwheels (Easy Party Bites)? VALENTINE’S DAY Ham and Cheese Pinwheels (Easy Party Bites) are a delightful appetizer made by rolling tortillas filled with layers of cream cheese, deli ham, sharp cheddar cheese, and fresh spinach. These bite-sized snacks are perfect for parties and gatherings, offering a blend of creamy, savory, and crunchy textures. Quick to prepare and visually appealing, these pinwheels will have your guests coming back for more. With the simplicity of ingredients and a preparation time of only 15 minutes, they make a fantastic addition to any Valentine’s Day celebration. How can I customize my VALENTINE’S DAY Ham and Cheese Pinwheels (Easy Party Bites)? You can easily customize your VALENTINE’S DAY Ham and Cheese Pinwheels (Easy Party Bites) to suit your taste or dietary preferences. Swap out the ham for turkey or chicken, and try different cheeses such as mozzarella, pepper jack, or feta for a unique twist. Adding herbs like basil or dill can enhance the flavor profile. Feel free to include other veggies like bell peppers or cucumbers for added crunch. The versatility of this recipe allows you to experiment while keeping the essence of the pinwheels intact. Can I make VALENTINE’S DAY Ham and Cheese Pinwheels (Easy Party Bites) in advance? Absolutely! It’s one of the best things
Delicious Pimento Cheese Recipe for Perfect Party Spreads
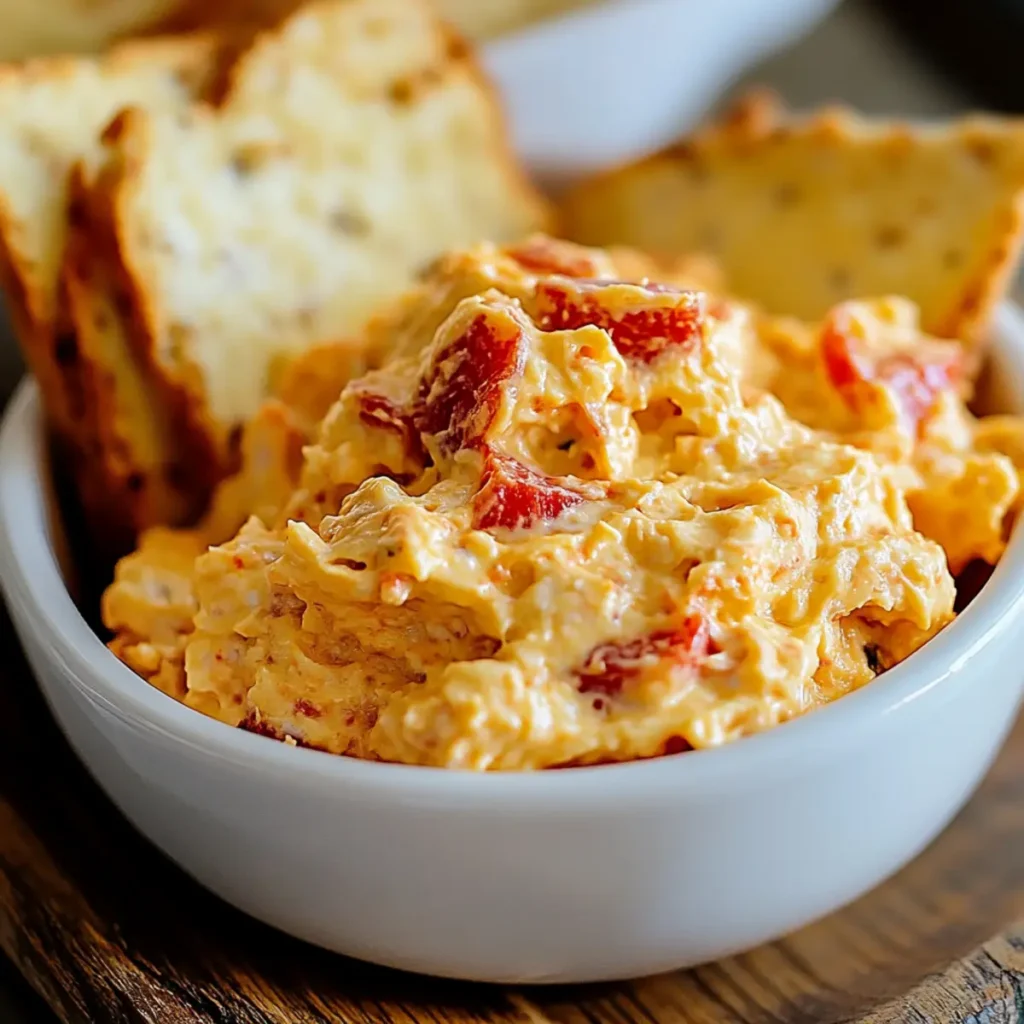
Pimento cheese is a creamy, dreamy spread that’s practically begging to be smeared on crackers or piled onto sandwiches. With its rich blend of sharp cheddar, zesty pimentos, and a little kick from cayenne, it’s the kind of dish that turns snack time into a glorious celebration of flavor. Whether you’re hosting a party or just craving a delightful bite, making your own pimento cheese is an experience that promises to tickle your taste buds. Picture diving into this delightfully cheesy concoction at your next gathering, where it effortlessly steals the spotlight from all those ho-hum dips. This pimento cheese is not just a recipe; it’s a memory maker, perfect for lazy summer picnics or cozy winter evenings spent catching up with friends. So, roll up your sleeves and let’s get to whipping up something extraordinary! Ingredients for Pimento Cheese Here’s what you’ll need to make this delicious Pimento Cheese: 2 cups sharp cheddar cheese – Grate it yourself for the best flavor and texture; sharp cheddar packs a punch that’s hard to beat. 8 oz cream cheese – Softened for easy mixing, cream cheese adds a rich, creamy base. ½ cup mayonnaise – This binds everything together and adds tanginess; use a good quality mayonnaise for the best results. 4 oz jarred pimentos – Drained and ready to go, pimentos bring both color and a hint of sweetness. 1 tsp garlic powder – This spice elevates the flavor profile; you could also use fresh minced garlic for a stronger kick. ½ tsp cayenne pepper – For those who like a little heat, cayenne adds a perfect touch; adjust according to your heat preference. How to Make Pimento Cheese Follow these simple steps to prepare this delicious Pimento Cheese: Step 1: Grate the Cheese Using a box grater, tear your sharp cheddar into fine shreds. This will make mixing much easier and ensure a delightful even melt when you dig into the final product. Step 2: Mix the Base In a large mixing bowl, combine the grated cheddar cheese with the softened cream cheese and mayonnaise. Use a fork or hand mixer to blend these ingredients until they’re silky smooth and creamy, making your heart do a little happy dance. Step 3: Add the Pimentos Once your base is mixed, gently fold in the drained jarred pimentos along with the garlic powder and cayenne pepper. Stir until everything is evenly distributed, and your kitchen smells divine. Step 4: Taste and Adjust Here’s where the magic happens. Taste your pimento cheese and adjust the seasoning if you feel it needs a little extra kick or a pinch more salt. Remember, this spread should sing with flavor! Step 5: Chill Out After mixing, transfer the pimento cheese into an airtight container and pop it in the refrigerator for at least an hour. This allows the flavors to mingle and intensify, creating that unforgettable taste experience we’re all craving. Step 6: Serve and Enjoy Once chilled, serve your fabulous pimento cheese with an assortment of crunchy crackers, fresh veggies, or spread it on your favorite sandwich. Get ready to make your taste buds swoon! This simple yet flavorful pimento cheese could be the highlight of your next gathering or a go-to snack in your kitchen. Packed with rich cheese and a touch of heat, it’s sure to impress family and friends alike, leaving everyone asking for more. So next time you’re looking to make something tasty and a little surprising, remember this delightful pimento cheese recipe. It’s just as easy to whip up as it is to devour! Perfecting Pimento Cheese Cooking Process To create the best Pimento Cheese, start by grating your sharp cheddar and softening the cream cheese. Next, combine the ingredients efficiently—mixing them in one bowl ensures consistent flavor throughout. Add Your Touch to Pimento Cheese Feel free to customize your Pimento Cheese by swapping sharp cheddar for a milder cheese or adding fresh herbs like dill or chives. You can also experiment with different spices to create your unique flavor. Storing & Reheating Pimento Cheese Store your Pimento Cheese in an airtight container in the refrigerator, where it can last up to a week. It can be enjoyed cold, but if you prefer it warm, simply heat it in the microwave for short intervals. I remember the first time I made Pimento Cheese for a gathering; my friends couldn’t get enough, and I was bombarded with recipe requests. It felt great to share something so simple yet so beloved! FAQs About Pimento Cheese What is Pimento Cheese? Pimento Cheese is a creamy and flavorful spread made primarily from cheese, mayonnaise, and pimentos. Originating in the Southern United States, it has become a beloved staple for gatherings, picnics, and parties. The base typically includes sharp cheddar cheese, which brings a rich flavor, while the pimentos lend a touch of sweetness and a pop of color. Many variations exist, incorporating different spices and ingredients, but the essence remains the same. This delightful spread is a perfect addition to sandwiches or served with crackers and veggies. How do you make Pimento Cheese? Making Pimento Cheese is surprisingly simple and requires just a handful of ingredients. Start by grating sharp cheddar cheese and softening cream cheese. Mix these together with mayonnaise, jarred pimentos, and your choice of spices like garlic powder and cayenne for a kick. Combine everything until smooth, then transfer it to a container and chill it for at least an hour. This resting period allows the flavors to meld beautifully, enhancing the taste that will surely impress your guests. What can I serve with Pimento Cheese? Pimento Cheese is incredibly versatile and pairs well with a variety of accompaniments. Classic choices include crispy crackers, artisanal bread, and fresh vegetables such as celery sticks and bell pepper slices. It also works wonderfully as a spread on sandwiches, adding a delightful twist to traditional recipes. For a heartier option, you can use it as a topping for baked potatoes or stuffed
Delicious Air Fryer Broccoli and Carrots in Just 17 Minutes
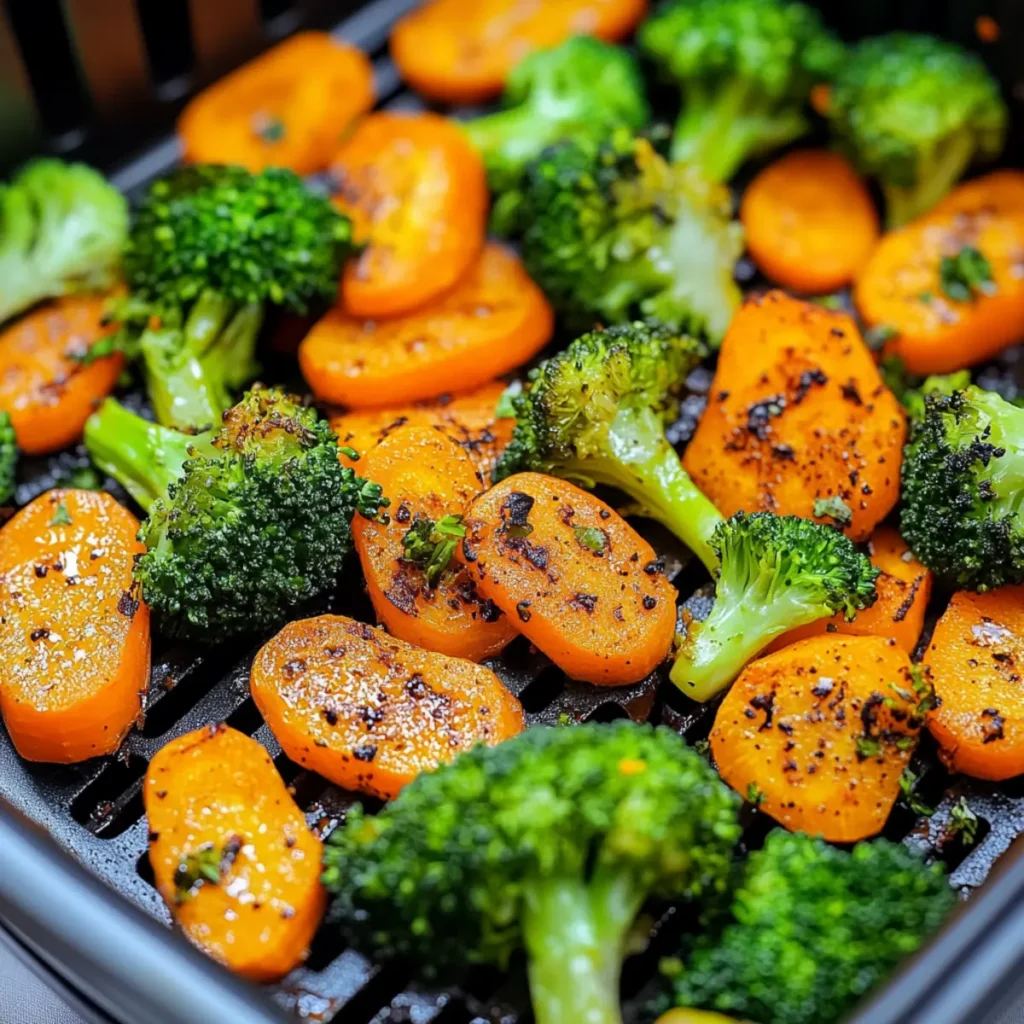
The delightful crunch of perfectly roasted vegetables wafts through your kitchen, promising flavor explosions with every bite, and that’s exactly what you get with Air Fryer Broccoli and Carrots. Imagine snacking on crisp-tender broccoli florets and sweet, vibrant carrot rounds that have been kissed by a dash of garlic. This dish is not just a side; it’s a showstopper that elevates simple, everyday ingredients into something truly extraordinary. Picture this: you’re prepping for a busy weeknight dinner, and the family is gathering around the table, eagerly anticipating your culinary creation. As the air fryer does its magic, you’ll have the luxury of enjoying relaxed conversation rather than standing by the stove. It’s about more than just food; this is a celebration of flavors and moments. Get ready to indulge in a sensational taste journey that’s quick and easy enough for any occasion. Ingredients for Air Fryer Broccoli and Carrots Here’s what you’ll need to make this delicious Air Fryer Broccoli and Carrots: 2 cups fresh broccoli florets – Look for bright green, firm florets; they’re packed with nutrients and flavor. 1 cup medium-sized carrots – Choose vibrant orange carrots for a sweeter taste, sliced into thin rounds to ensure even cooking. 2 tsp olive oil – A healthy fat that helps achieve a perfect golden-brown texture while locking in moisture. 1 tsp garlic powder – This adds a delightful aromatic flavor that harmonizes beautifully with the veggies. ¼ tsp salt – Enhances the natural flavors of the broccoli and carrots. ¼ tsp black pepper – A pinch of spice to elevate the taste profile and add a little kick. How to Make Air Fryer Broccoli and Carrots Follow these simple steps to prepare this delicious Air Fryer Broccoli and Carrots: Step 1: Wash and Prep Your Veggies Begin by washing the broccoli and carrots under cool running water. This helps to remove any dirt or residue. Cut the broccoli into bite-sized florets and slice the carrots into thin rounds. The smaller the pieces, the more evenly they cook. Step 2: Toss with Seasonings In a large mixing bowl, toss the freshly prepped broccoli and carrots together with olive oil, garlic powder, salt, and pepper. Make sure every piece is evenly coated. This is where the fun begins; feel free to get in there with your hands and mix things up! Step 3: Preheat Your Air Fryer While you’re mixing, preheat your air fryer to 375°F (190°C). This step is crucial for ensuring that your veggies turn out crispy and tender. Remember, the air fryer works its magic best when it’s ready to go! Step 4: Arrange the Vegetables Once preheated, take the seasoned veggies and place them in the air fryer basket in a single layer. It’s essential not to overcrowd the basket; proper air circulation is key to achieving that lovely crunch. Step 5: Cook to Perfection Air fry the broccoli and carrots for about 10-12 minutes. Halfway through cooking, pause to shake the basket gently. This ensures they cook evenly and don’t stick together, helping every piece to reach its crispy destiny. Step 6: Serve and Enjoy Once your Air Fryer Broccoli and Carrots are perfectly roasted and aromatic, it’s time to serve! They make a delightful side dish or a satisfying snack on their own. Drizzle with a bit more olive oil, if you like, and enjoy the beautiful colors and flavors! This stunning Air Fryer Broccoli and Carrots brings a burst of life and color to your table, transforming any ordinary meal into an extraordinary feast. Ideal for family dinners, meal prepping, or even a quick snack, this dish has your back in all culinary adventures! Enjoy the versatility and delightful crunch as you dig in. Perfecting Air Fryer Broccoli and Carrots Cooking Process When cooking Air Fryer Broccoli and Carrots, start by washing and prepping your veggies. Season them well before preheating your air fryer. This ensures they cook evenly and maximize flavor in every bite. Add Your Touch to Air Fryer Broccoli and Carrots Feel free to mix things up by adding different seasonings like paprika or cayenne pepper for some spice. You can also try adding a sprinkle of parmesan cheese or a squeeze of lemon before serving for a fresh twist. Storing & Reheating Air Fryer Broccoli and Carrots Store any leftovers in an airtight container in the fridge for up to three days. To reheat, simply pop them back in the air fryer for about 3-5 minutes to regain that crispy texture. The first time I made Air Fryer Broccoli and Carrots for a friend, he asked if I had snuck into a fancy restaurant’s kitchen; I was thrilled to share the simple secret behind this delightful dish! FAQs About Air Fryer Broccoli and Carrots What is Air Fryer Broccoli and Carrots? Air Fryer Broccoli and Carrots is a quick and healthy side dish that features fresh broccoli florets and sliced carrots tossed in olive oil and seasonings. This dish gets its crispy and tender texture from the air fryer, making it a perfect option for a nutritious meal. You can whip it up in just 17 minutes, making it an ideal choice for busy weeknights or whenever you’re craving some vibrant veggies. How do I ensure my Air Fryer Broccoli and Carrots are crispy? To achieve that perfect crispy texture, make sure to toss the broccoli and carrots evenly in olive oil and seasonings before cooking. Preheating your air fryer is essential, so it creates a hot air environment that crisps the outside while keeping the inside tender. Cook them in a single layer and shake the basket about halfway through to ensure even cooking. This method will guarantee delicious crunchiness in every bite. Can I customize my Air Fryer Broccoli and Carrots recipe? Absolutely! One of the best aspects of Air Fryer Broccoli and Carrots is its versatility. You can experiment with different seasonings such as paprika, cayenne pepper, or even a sprinkle of garlic or onion powder.
Easy Super Bowl Guacamole Recipe for the Best Football Party Dip
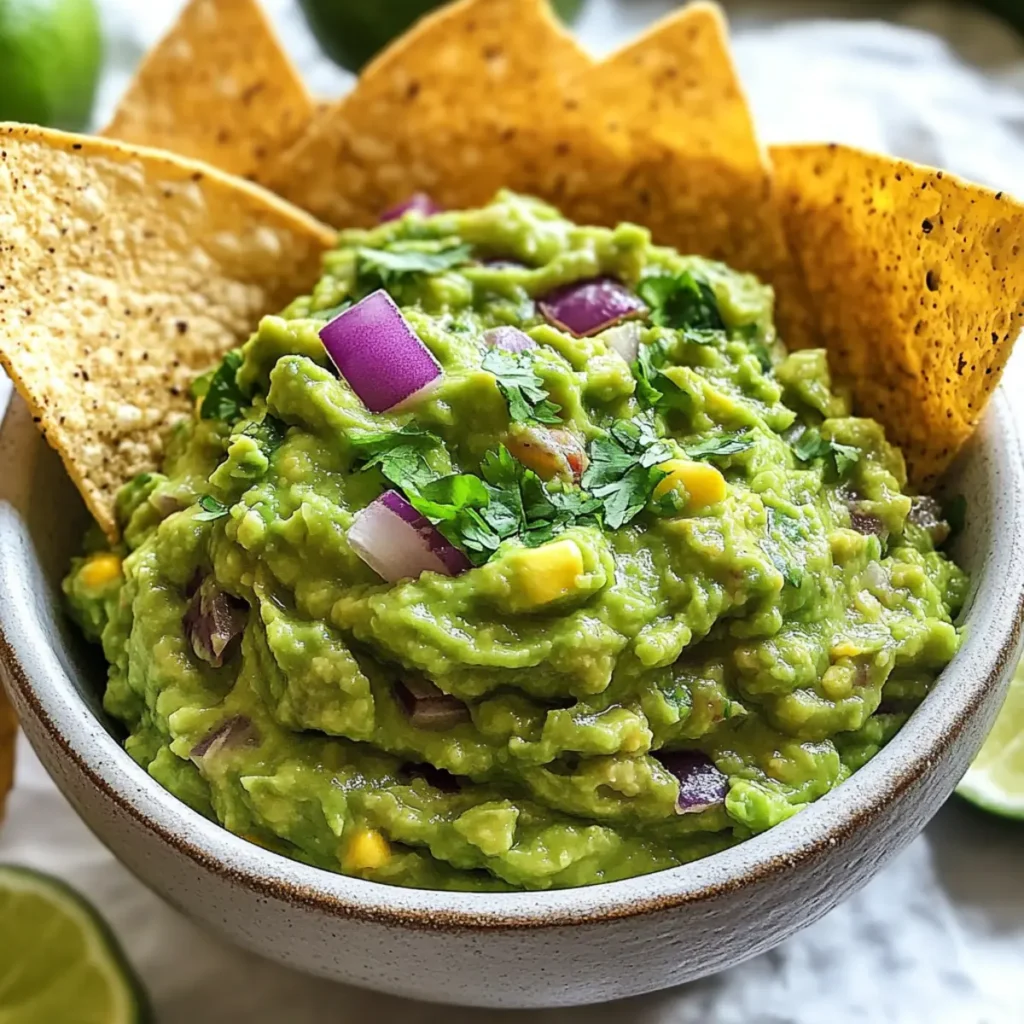
Imagine sinking your chip into a bowl of vibrant green guacamole, the creamy texture melting in your mouth as tangy lime dances with the freshness of cilantro. This easy Super Bowl guacamole recipe is not just a dip; it’s a fiesta on your taste buds, a celebration of flavors that perfectly complements your favorite tortilla chips. If you’re looking to wow your friends and family during game day or any gathering, this is the dip that steals the show. Guacamole has a special place on my table; it bridges generations and brings laughter with every scoop. I still recall my grandmother’s enthusiastic moments in the kitchen, where the simple act of mashing avocados became an art form. Every Super Bowl Sunday, her zesty guac would disappear in a matter of minutes, replaced only by the echoes of joyous cheers. Trust me, this Super Bowl guacamole recipe helps you create not just delicious food but cherished memories as well. Ingredients for Super Bowl Guacamole Recipe (Best Football Party Dip) Here’s what you’ll need to make this delicious Super Bowl Guacamole Recipe (Best Football Party Dip): 2 ripe avocados – Opt for ones that yield slightly to pressure for creaminess; they should feel like a soft pillow when squeezed. 1 lime (juiced) – Freshly squeezed lime juice adds a zesty brightness; bottled juice just doesn’t cut it. 1/4 cup red onion (finely chopped) – Adds a mild, sweet crunch without overpowering the guac. 1 medium tomato (diced) – Make sure it’s ripe; it will bring juiciness and freshness. 1 jalapeño (diced, seeds removed for mildness) – Spice it up or tone it down depending on your heat preference. 1/4 cup fresh cilantro (chopped) – The herb of choice for that fresh, vibrant flavor. 1/2 tsp salt – Enhances and balances all the flavors beautifully. How to Make Super Bowl Guacamole Recipe (Best Football Party Dip) Follow these simple steps to prepare this delicious Super Bowl Guacamole Recipe (Best Football Party Dip): Step 1: Prepare the Avocados Cut the avocados in half, carefully remove the pit (no one wants an unexpected pit surprise), and scoop the bright green flesh into a mixing bowl. Remember to admire their beautiful color; it’s the perfect start to your guacamole masterpiece. Step 2: Mash it Up Using a fork or a potato masher, mash the avocados to your desired consistency. Whether you prefer it super smooth or a little chunky, you’re the boss here. Just don’t overdo it; you want to keep some personality in that guac! Step 3: Add the Zest Pour in the freshly squeezed lime juice and sprinkle in the salt. This tangy addition not only enhances the flavor but also stops the avocados from turning brown faster. No one likes sad-looking brown guac. Step 4: Mix in the Good Stuff Gently fold in the red onion, diced tomato, jalapeño, and cilantro. Stir carefully to combine, keeping some lumps for texture. Taste as you go and adjust seasoning if necessary. We need it to sing, not fall flat! Step 5: Serve it Up Transfer your guacamole to a serving bowl and get creative with the presentation. Garnish with extra cilantro on top. Serve immediately alongside crispy tortilla chips for the ultimate experience. You’ll find that this guacamole isn’t just for your Super Bowl party; it’s perfect for game nights, summer barbecues, or when you simply need a delicious avocado fix. Whether you’re enjoying it with friends cheering for your favorite team or indulging solo while binge-watching the latest series, this Super Bowl guacamole recipe will become a beloved staple in your kitchen. So grab those avocados, channel your inner guacamole artist, and let the flavor festivities begin! Perfecting Super Bowl Guacamole Recipe (Best Football Party Dip) Cooking Process Start by prepping all ingredients before you begin. Cut avocados, lime, onion, and jalapeño first. Mashed avocado should be the earliest step, followed by adding lime juice and gently folding in the rest to keep that lovely texture. Add Your Touch to Super Bowl Guacamole Recipe (Best Football Party Dip) Feel free to spice things up! Try adding diced mango for a hint of sweetness, or some crumbled feta cheese for a tangy twist. Experiment with spices like garlic powder or cumin for an extra flavor boost. Storing & Reheating Super Bowl Guacamole Recipe (Best Football Party Dip) To store guacamole, place it in an airtight container and press plastic wrap directly on the surface to prevent browning. Enjoy it cold; reheating is not recommended as it alters the texture. When I first made this guacamole for a Super Bowl party, everyone raved about it! The secret was using perfectly ripe avocados, and watching the bowl empty faster than I could refill it truly warmed my heart. FAQs About Super Bowl Guacamole Recipe (Best Football Party Dip) What is Super Bowl Guacamole Recipe (Best Football Party Dip)? The Super Bowl Guacamole Recipe (Best Football Party Dip) is a delightful blend of ripe avocados, zesty lime juice, and fresh vegetables, making it the ultimate snack for any gathering. It’s creamy, flavorful, and incredibly easy to make. This dish is often served during football parties, where it quickly becomes the star of the table. You can customize it with various toppings or add-ins, ensuring it suits everyone’s taste buds. This guacamole doesn’t just please the palate; it also brings a festive flair to your Super Bowl celebrations. How can I customize my Super Bowl Guacamole Recipe (Best Football Party Dip)? One of the best aspects of the Super Bowl Guacamole Recipe (Best Football Party Dip) is its versatility. You can easily customize it by adding different ingredients to make it your own. Consider mixing in diced mango for a sweet touch or crumbled feta cheese for extra tanginess. Spice lovers might want to incorporate garlic powder or cayenne pepper for a kick. Don’t forget to experiment with textures by adding roasted corn or black beans, which give the guacamole an exciting twist and extra flavor depth. How
Delicious Chicken Spring Rolls Recipe Ready in Just 35 Minutes
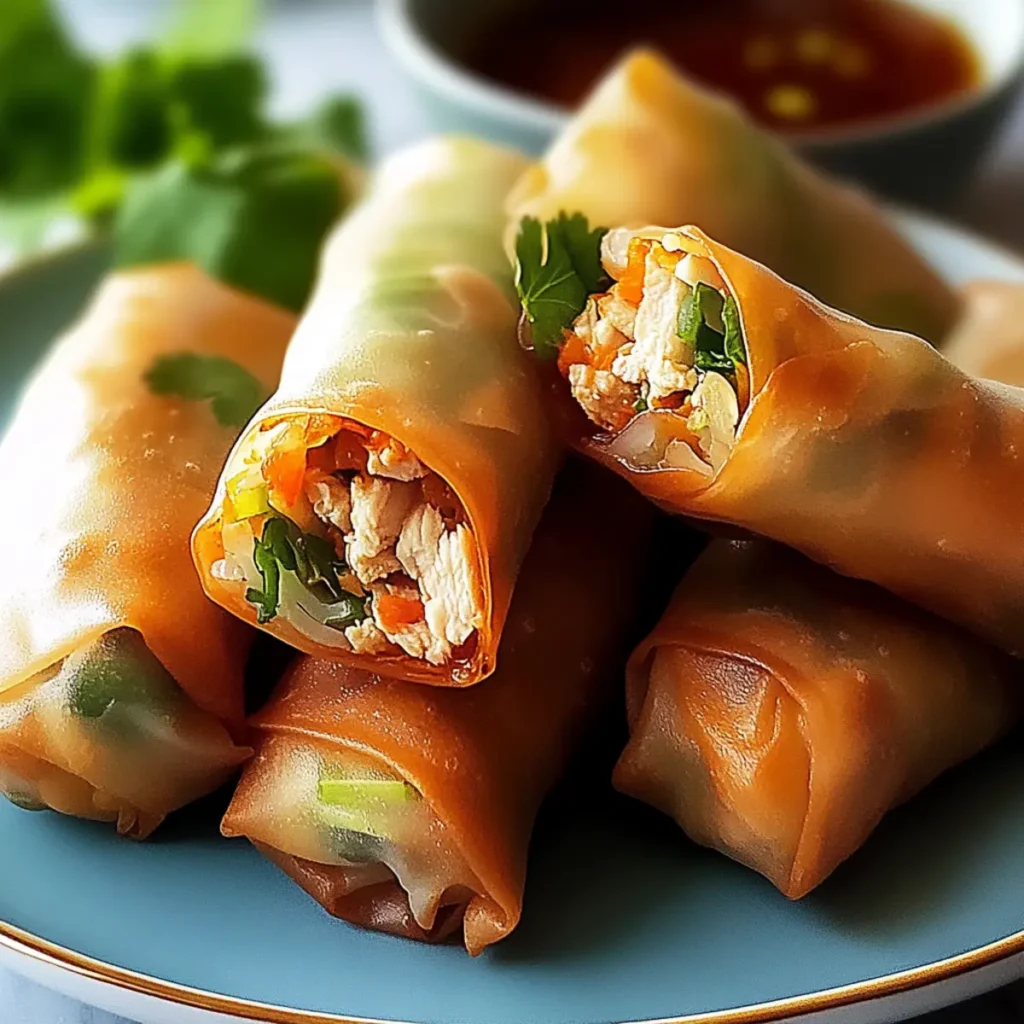
Imagine biting into a crispy Chicken Spring Roll, with tender chicken mingling with a medley of fresh vegetables, all wrapped in a delicate rice paper—sounds tempting, right? This Chicken Spring Rolls Recipe brings together flavors and textures that dance on your palate while transporting you straight to a street food market in Southeast Asia, all from the comfort of your kitchen. Whether you are gearing up for a casual weeknight dinner or hosting friends for a fun-filled evening, these rolls will steal the show. With the perfect balance of savory and crunchy, not to mention the mouthwatering garlic and sesame aromas wafting through your home, you’ll find it hard to resist going back for seconds—or thirds. Trust me, your taste buds are in for a treat! Ingredients for Chicken Spring Rolls Recipe Here’s what you’ll need to make this delicious Chicken Spring Rolls Recipe: 3 boneless, skinless chicken breasts (about 1.5 lbs) – A great source of protein; opt for organic if available for even better flavor and health benefits. 2 cloves garlic, minced – Fresh garlic adds a lovely aromatic punch to the filling. 1 cup shredded green cabbage – Offers a satisfying crunch and freshness; feel free to substitute with Napa cabbage if you prefer. 1 cup shredded purple cabbage – Provides vibrant color and additional texture; it’s also packed with nutrients. 1 cup shredded carrots – Adds sweetness and a pop of color, making the spring rolls visually appealing. 12 rice paper wrappers – These are the perfect vessel for our filling; they soften beautifully in water and create that famous chewy texture. 2 tbsp low-sodium soy sauce – Enhances the umami flavor without overpowering the other ingredients; low-sodium helps keep it healthier. 1 tsp sesame oil – A small amount of this oil brings a rich, nutty flavor to the mix, elevating the dish to new heights. How to Make Chicken Spring Rolls Recipe Follow these simple steps to prepare this delicious Chicken Spring Rolls Recipe: Step 1: Prepare the Chicken Preheat your oven to 375°F (190°C). Season the chicken breasts with salt and pepper. Place them in a skillet over medium heat, cooking each side for about 6-7 minutes until they’re no longer pink in the middle. Once cooked, remove from heat and let them cool slightly. Step 2: Shred the Chicken Once the chicken has cooled, use your hands or two forks to shred the meat into bite-sized pieces. This is where the magic happens! You should have about 2 cups of shredded chicken to work with. Step 3: Mix the Filling In a large mixing bowl, combine the shredded chicken, minced garlic, shredded green and purple cabbages, shredded carrots, soy sauce, and sesame oil. Mix it all together until every juicy piece of chicken is coated in the goodness. Your house will smell amazing right about now. Step 4: Soften the Rice Paper Fill a shallow dish with warm water. Dip one rice paper wrapper into the water for about 15-20 seconds, or until it becomes pliable but not overly soft. It’s like a warm hug for the wrapper! Step 5: Roll the Spring Rolls Place the softened wrapper on a clean surface. Spoon about two tablespoons of the chicken filling near one edge of the wrapper. Roll it tightly away from you, tucking in the sides as you go. Repeat with the remaining wrappers and filling. Step 6: Bake the Spring Rolls Arrange your beautifully rolled spring rolls on a baking sheet lined with parchment paper. Brush them lightly with olive oil to encourage that golden brown finish and bake for 15-20 minutes until they are crispy and golden. As you gather around the table, serve these delightful chicken spring rolls with your favorite dipping sauce—be it sweet chili, hoisin, or even just a splash of soy sauce. Trust me, these Chicken Spring Rolls will disappear faster than you can say “extra soy sauce, please!” Enjoy each bite, and don’t forget to make enough for seconds. After all, who could resist this delightful treat? Happy cooking! Perfecting Chicken Spring Rolls Recipe Cooking Process Start by cooking the chicken first, ensuring it’s perfectly tender. While the chicken cools, prep your vegetables. It streamlines the process, allowing you to assemble the spring rolls once everything is ready for optimal freshness. Add Your Touch to Chicken Spring Rolls Recipe Feel free to customize your Chicken Spring Rolls Recipe with different proteins like shrimp or tofu. You can also add herbs like cilantro or mint for an extra burst of flavor, or swap out the cabbage for other crunchy vegetables. Storing & Reheating Chicken Spring Rolls Recipe To store leftover spring rolls, place them in an airtight container in the fridge for up to three days. Reheat in the oven at a low temperature to retain their crispiness, avoiding the microwave which can make them soggy. I once made these Chicken Spring Rolls for a potluck and they vanished within minutes. My friends still ask me for the recipe, which made me feel like a culinary rock star for a night! FAQs About Chicken Spring Rolls Recipe What is Chicken Spring Rolls Recipe? The Chicken Spring Rolls Recipe is a delightful dish combining tender chicken and fresh vegetables all wrapped up in light rice paper. It’s a fusion of flavors and textures that makes it perfect for appetizers or even a light main course. These spring rolls are not only delicious but also versatile, allowing for a variety of fillings based on your preferences. They can be served with various dipping sauces for an added kick, making them a crowd-pleaser at any gathering. How long does it take to make Chicken Spring Rolls? Preparing the Chicken Spring Rolls takes approximately 35 minutes, which includes both the prep and cooking time. You’ll invest 15 minutes to prep your ingredients and about 20 minutes for cooking and baking. This simple yet flavorful dish can be made quickly enough for a weeknight dinner or a surprise guest. Plus,