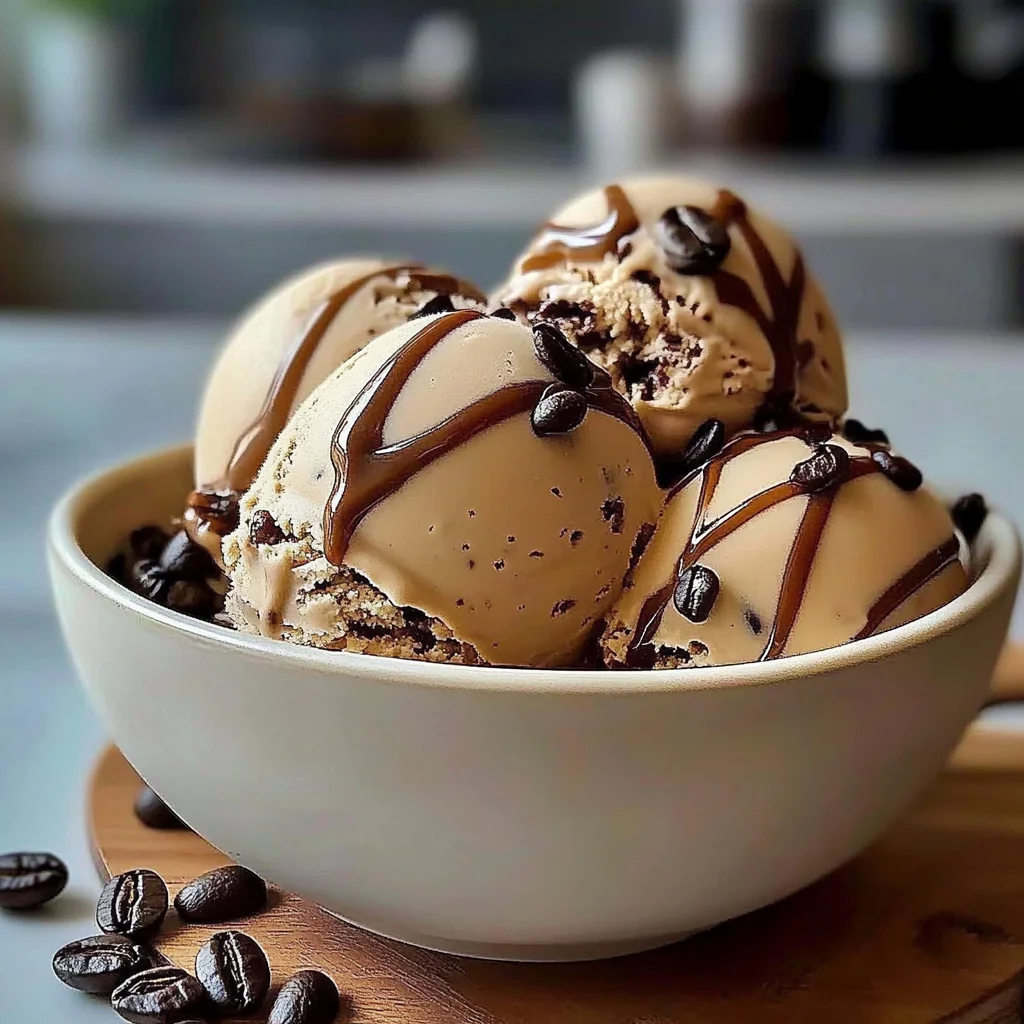
Imagine a scoop of velvety coffee ice cream melting gently on your tongue, the rich aroma of freshly brewed coffee dancing in the air, and a hint of sweetness that teases your taste buds. This delightful treat, with its creamy texture and bold flavor, is like a warm hug on a hot summer day or a cozy companion during chilly nights. Whether you’re savoring it alone or sharing it with friends after dinner, coffee ice cream is sure to elevate any occasion to something special.
As I recall my first encounter with this magical dessert, I can still picture the laughter and chatter around the kitchen table as we indulged in homemade batches, each spoonful bringing back memories of family gatherings filled with joy. The anticipation builds as you scoop into this rich creation, promising an explosion of flavor that even the most discerning coffee aficionados will adore. Each bite is an invitation to pause and relish the moment, making coffee ice cream not just a dessert but a delightful experience that deserves its place in your heart—and your freezer.
Why Is coffee ice cream So Irresistibly Good?
Indulge in the velvety richness of this coffee ice cream, crafted with heavy cream and whole milk for a creamy texture that melts in your mouth. Sweetened to perfection with granulated sugar, every scoop is a delightful treat. The addition of instant coffee granules delivers a bold flavor that coffee lovers crave, while a hint of vanilla extract rounds out the taste beautifully. Plus, with just 15 minutes of prep time, you can whip up this crowd-pleaser quickly, making it the perfect dessert for any occasion!
coffee ice cream Ingredients
- 2 cups heavy cream – This rich base gives your coffee ice cream a luxurious, creamy texture that melts in your mouth.
- 1 cup whole milk – Using whole milk adds to the richness and helps balance the sweetness of the ice cream.
- 3/4 cup granulated sugar – This amount provides just the right sweetness to enhance the bold coffee flavor without overpowering it.
- 1 tablespoon instant coffee granules – Instant coffee is perfect for adding a robust coffee flavor throughout the ice cream mixture.
- 1 teaspoon vanilla extract – A splash of vanilla extract rounds out the flavors and adds a subtle warmth to your coffee ice cream.
- 4 large egg yolks – These egg yolks create a custard-like base that makes your ice cream incredibly smooth and creamy.
How to Make coffee ice cream

1. Combine ingredients: In a saucepan, combine 2 cups of heavy cream, 1 cup of whole milk, and 3/4 cup of granulated sugar. Heat over medium until the sugar dissolves and the mixture is hot but not boiling.
2. Whisk yolks: In a separate bowl, whisk together 4 large egg yolks. Gradually add a small amount of the hot cream mixture to the yolks, whisking constantly to temper them and prevent curdling.
3. Mix and thicken: Pour the tempered yolks back into the saucepan with the cream mixture. Cook over low heat, stirring constantly until it thickens and coats the back of a spoon—about 5-10 minutes.
4. Dissolve flavors: Remove from heat and stir in 1 tablespoon of instant coffee granules and 1 teaspoon of vanilla extract until fully dissolved, creating that rich coffee flavor.
5. Cool down: Let the mixture cool to room temperature for about 15 minutes, then refrigerate until completely chilled—this usually takes around 2 hours.
6. Churn it up: Once chilled, pour the mixture into an ice cream maker and churn according to the manufacturer’s instructions until it reaches a soft-serve consistency—typically about 20-25 minutes.
7. Freeze firm: Transfer your coffee ice cream to an airtight container and freeze for at least 2 hours to firm up before serving—patience will reward you with creamy goodness!
Optional: Top with chocolate shavings or espresso beans for an extra touch!
Exact quantities are listed in the recipe card below.
Expert Tips
- Chill the Base: Ensure your cream mixture is completely chilled before churning; this helps achieve a smoother coffee ice cream texture.
- Tempering Technique: Gradually adding hot cream to the egg yolks prevents scrambling. Whisk constantly for best results, ensuring a creamy base.
- Watch the Heat: Cook the mixture over low heat to avoid curdling the yolks. The goal is a thickened custard that coats the spoon without boiling.
- Instant Coffee Quality: Use high-quality instant coffee granules for a richer flavor. Dissolve them thoroughly to avoid gritty coffee ice cream.
- Storage Secrets: Store your ice cream in an airtight container to prevent freezer burn and maintain its creamy consistency for longer.
How to Store and Freeze coffee ice cream
- Freezer: Store your homemade coffee ice cream in an airtight container. It will maintain its best quality for up to 2 weeks, but can last up to a month.
- Fridge: If you have leftover ice cream batter before churning, keep it covered in the fridge for no more than 24 hours for optimal freshness.
- Serving: When ready to enjoy, let the coffee ice cream sit at room temperature for about 5 minutes before scooping, making it easier to serve.
- Avoid Freezer Burn: Press a piece of parchment paper directly onto the surface of the ice cream before sealing to help prevent freezer burn and maintain that creamy texture.
coffee ice cream Your Way
Feel free to get creative and tailor this luscious treat to your taste buds!
- Dairy-Free: Substitute heavy cream and whole milk with coconut cream and almond milk for a deliciously creamy vegan twist. This variation brings a tropical flair that complements the coffee beautifully.
- Sweetened Condensed Milk: Swap out granulated sugar for one can of sweetened condensed milk. This will add an extra layer of richness and eliminate the need for egg yolks.
- Mocha Delight: Add 1/4 cup of chocolate syrup for a delightful chocolate-coffee fusion. The combination creates a decadent dessert that any chocolate lover will adore.
- Spiced Coffee: Mix in 1/2 teaspoon ground cinnamon or nutmeg for a warm, inviting aroma. The spices elevate the flavor, giving it an exotic touch that’s perfect for chilly nights.
- Nutty Accent: Incorporate 1/2 cup finely chopped hazelnuts or almonds into the mixture before churning. The crunch adds texture and a lovely nutty flavor that pairs perfectly with coffee.
- Coffee Liqueur: Stir in 1/4 cup of your favorite coffee liqueur for an adult twist. This addition deepens the coffee flavor while giving your ice cream a sophisticated edge.
- Ice Cream Sandwiches: Use this base to create delightful ice cream sandwiches by placing scoops between two cookies. It’s a fun way to enjoy your homemade creation with friends and family!
Make Ahead Options

This rich and creamy coffee ice cream is perfect for meal prep, allowing you to indulge in a delightful treat without the last-minute rush. You can prepare the base ingredients—2 cups of heavy cream, 1 cup of whole milk, 3/4 cup of granulated sugar, and the egg yolks—up to 24 hours in advance. Start by combining the heavy cream, whole milk, and sugar in a saucepan, heating until dissolved. Whisk the egg yolks separately and gradually temper them with the hot mixture before cooking it all together until thickened. After stirring in the instant coffee granules and vanilla extract, let it cool before refrigerating for up to 2 hours. Once ready to serve, simply churn the chilled mixture in your ice cream maker and freeze for at least 2 hours for that perfect scoop of coffee ice cream. This approach not only saves time but also ensures quality and flavor when it’s time to enjoy your homemade treat!
coffee ice cream Recipe FAQs
What type of heavy cream should I use for my coffee ice cream?
For the richest and creamiest texture, opt for heavy whipping cream with a fat content of at least 36%. This ensures your ice cream is luxuriously smooth and rich, making it the perfect treat for any coffee lover.
Can I substitute whole milk with another type of milk?
Yes, you can use 2% milk or even almond milk for a lighter version. However, remember that using lower-fat alternatives will result in a less creamy texture. If you’re looking for a dairy-free option, coconut milk can add a delightful richness, but it may impart a subtle coconut flavor.
How should I store my homemade coffee ice cream?
Once churned and transferred to an airtight container, your coffee ice cream can be stored in the freezer for up to two weeks. To maintain its creamy consistency, press plastic wrap directly onto the surface of the ice cream before sealing the container tightly.
What if my ice cream isn’t thickening properly during churning?
If your mixture hasn’t thickened well after churning for the recommended time, ensure that it was adequately chilled before pouring it into the ice cream maker. The base should be thoroughly cooled—about 2 hours in the refrigerator—before churning; this helps achieve that perfect soft-serve consistency.
Can I adjust the sweetness of my coffee ice cream?
Absolutely! If you prefer a less sweet treat, feel free to reduce the granulated sugar to 1/2 cup or even less, depending on your taste preference. Just keep in mind that sugar not only adds sweetness but also affects texture; too little might yield a harder ice cream.
How many servings does this recipe yield?
This delightful coffee ice cream recipe makes approximately 4 servings. Each serving contains about 300 calories, making it an indulgent yet manageable dessert for when you’re craving something special without going overboard!
Coffee Ice Cream
Ingredients
Method
- In a saucepan, combine the heavy cream, whole milk, and sugar. Heat over medium heat until the sugar dissolves and the mixture is hot but not boiling.
- In a separate bowl, whisk the egg yolks. Gradually add a small amount of the hot cream mixture to the yolks, whisking constantly to temper them.
- Pour the tempered yolks back into the saucepan with the cream mixture. Cook over low heat, stirring constantly, until the mixture thickens and coats the back of a spoon.
- Remove from heat and stir in the instant coffee granules and vanilla extract until fully dissolved.
- Let the mixture cool to room temperature, then refrigerate until completely chilled, about 2 hours.
- Once chilled, pour the mixture into an ice cream maker and churn according to the manufacturer's instructions until it reaches a soft-serve consistency.
- Transfer the ice cream to an airtight container and freeze for at least 2 hours to firm up.